sábado, 28 de abril de 2012

Google Translate Widget with Flags For Blogger

The Google Translate Widget for Blogger allows the visitors to translate your site or blog in their own language.
This widget also auto-detect your blog language and then translate it to the readers chosen language.

It supports 12 different languages:
English, French, German, Spanish, Italian, Dutch, Portuguese, Russian, Japanese, Korean, Arabic And Chinese.
google translate for blogger, blogger gadgets, blogger tricks

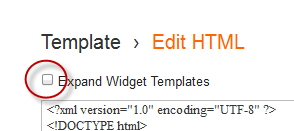
How To Add The Google Translate Widget To Blogger

Step 1. Go to your Blogger Dashboard >> Layout and click on "Add A Gadget" link


Step 2. From the pop-up window, scroll down and choose HTML/JavaScript


 Step 3. Paste the code below in the empty box:

<script type="text/javascript">
function showHide(shID) {
    if (document.getElementById(shID)) {
        if (document.getElementById(shID+'-show').style.display != 'none') {
            document.getElementById(shID+'-show').style.display = 'none';
            document.getElementById(shID).style.display = 'block';
        }
        else {
            document.getElementById(shID+'-show').style.display = 'inline';
            document.getElementById(shID).style.display = 'none';
        }
    }
}
</script>

<style>

 .google_translate img {
margin: 10px 20px 0px 20px;
    height: 24px;
    width: 24px;
        }
        .google_translate:hover img {
filter:alpha(opacity=0.30);
        -moz-opacity: 0.30;
        opacity: 0.30;
        border:0;
        }

.more {
    display: none;
a.showLink, a.hideLink {
    text-decoration: none;
    color: #0880C4;
    padding-left: 18px;
    background: transparent('down.gif') no-repeat left; }

a.hideLink {
    background: transparent url('up.gif') no-repeat left;
color: #0880C4;}

a.showLink:hover, a.hideLink:hover {
color: #0880C4;
 }

 </style>

 <div>

 <a class="google_translate" href="#" target="_blank" rel="nofollow" title="English" onclick="window.open('http://translate.google.com/translate?u='+encodeURIComponent(location.href)+'&langpair=auto%7cen&hl=en'); return false;"><img alt="English" border="0" align="absbottom" title="English" height="24" src="https://blogger.googleusercontent.com/img/b/R29vZ2xl/AVvXsEh2mBOVO2saKEqh753VvSHxtFHAHJ141UMmIF_r3RlrER_cep-dxXjpj0pkuz2Ihm9ksT8Stc-z486VLLs2maq_yQwUhU3h7BiTs7suf61Xvn7pY8U5NlSFcglVtWm7AmBrrSIUw11C4PCe/s1600/United+Kingdom(Great+Britain).png" style="cursor: pointer;margin-right:8px" width="24"/></a>

 <a class="google_translate" href="#" target="_blank" rel="nofollow" title="French" onclick="window.open('http://translate.google.com/translate?u='+encodeURIComponent(location.href)+'&langpair=auto%7cfr&hl=en'); return false;"><img alt="French" border="0" align="absbottom" title="French" height="24" src="https://blogger.googleusercontent.com/img/b/R29vZ2xl/AVvXsEghscau9DDfcjfbfcl2EGmJe9YscDeYmwfqg6DgE0-7KFcFH7iKtLwltb8AH1vghAC7UV5NbtsZnIMJqPOIAv4lDgBSQX1bGnXKhyphenhyphenAsfbbF0EsChHOORLhOONSd95CKaKZEk6-tDciRXnvT/s1600/France.png" style="cursor: pointer;margin-right:8px" width="24"/></a>

 <a class="google_translate" href="#" target="_blank" rel="nofollow" title="German" onclick="window.open('http://translate.google.com/translate?u='+encodeURIComponent(location.href)+'&langpair=auto%7cde&hl=en'); return false;"><img alt="German" border="0" align="absbottom" title="German" height="24" src="https://blogger.googleusercontent.com/img/b/R29vZ2xl/AVvXsEirtOTcP-xhZJ1RcgFTvm2Lqw9An9ppAK0Ku02So3m68GAlmkBPwgVsd5tsLpjbPgJCksfHkXGGEz9Ew6kYpr6G0a8zzbJEbihUuVt1Mrxb_dOAWdiwleNAJ40slFfuQalEhyiHaTE9L7MU/s1600/Germany.png" style="cursor: pointer;margin-right:8px" width="24"/></a>

 <a class="google_translate" href="#" target="_blank" rel="nofollow" title="Spain" onclick="window.open('http://translate.google.com/translate?u='+encodeURIComponent(location.href)+'&langpair=auto%7ces&hl=en'); return false;"><img alt="Spain" border="0" align="absbottom" title="Spain" height="24" src="https://blogger.googleusercontent.com/img/b/R29vZ2xl/AVvXsEj6V0I9AB7uNnHCCLRVuQQUBjPU_Dt2_YkdvbR6pLGF75FntFeVz2Fe7QYGhOK8Ia7S8LHmyHTe37iujUPhQhveEDCyPOEqY52AVdkyOjmR7A9sGIzCxrYISvZe4mlYGzd56IiwKyeATSPj/s1600/Spain.png" style="cursor: pointer;margin-right:8px" width="24"/></a><a href="#" id="example-show" class="showLink"
onclick="showHide('example');return false;">More</a>
<div id="example" class="more">
 <a class="google_translate" href="#" target="_blank" rel="nofollow" title="Italian" onclick="window.open('http://translate.google.com/translate?u='+encodeURIComponent(location.href)+'&langpair=auto%7cit&hl=en'); return false;"><img alt="Italian" border="0" align="absbottom" title="Italian" height="24" src="https://blogger.googleusercontent.com/img/b/R29vZ2xl/AVvXsEjqPbeSr-zdMHiDuUkyLUFpUXQzA2YXgsdL9326ZMbpIDDXsozLmzrMiB6Pm8jE52gmWCBMZvRk_wphhYscPKlz9ZNdZvwtp7h-eFt67amRCbM-kUtuoNHKcMMNvLUm16CUgS9GyZ7lqnKi/s1600/Italy.png" style="cursor: pointer;margin-right:8px" width="24"/></a>

 <a class="google_translate" href="#" target="_blank" rel="nofollow" title="Dutch" onclick="window.open('http://translate.google.com/translate?u='+encodeURIComponent(location.href)+'&langpair=auto%7cnl&hl=en'); return false;"><img alt="Dutch" border="0" align="absbottom" title="Dutch" height="24" src="https://blogger.googleusercontent.com/img/b/R29vZ2xl/AVvXsEgEZ1sIAVd_0ER3puCXnNknms9z4r8LRrzqaINgVDBhADg0CmAv1yTW-CtnF7k7i23-2rCFFJlTji_kY8drnVyT57YwAv2wmSwgGpli38goWQeqUPgBRKp792Qynwj-PegTJt1uICIfctWX/s1600/Netherlands.png" style="cursor: pointer;margin-right:8px" width="24"/></a>
      <a class="google_translate" href="#" target="_blank" rel="nofollow" title="Russian" onclick="window.open('http://translate.google.com/translate?u='+encodeURIComponent(location.href)+'&langpair=auto%7cru&hl=en'); return false;"><img alt="Russian" border="0" align="absbottom" title="Russian" height="24" src="https://blogger.googleusercontent.com/img/b/R29vZ2xl/AVvXsEjg9yCeKLbGTFIDgcTaan57yAKc1KtleXCGd_sKrExoBLzLKBHF6MFbc_9D7Dwn4AckQSQIxv9TKlzO8-tKE4rpmA57933sR3Kw5nqiuMO_DBYrhQ9htqoiNGXPtv8Z583EcjKx4ew-6aKY/s1600/Russian+Federation.png" style="cursor: pointer;margin-right:8px" width="24"/></a>

 <a class="google_translate" href="#" target="_blank" rel="nofollow" title="Portuguese" onclick="window.open('http://translate.google.com/translate?u='+encodeURIComponent(location.href)+'&langpair=auto%7cpt&hl=en'); return false;"><img alt="Portuguese" border="0" align="absbottom" title="Portuguese" height="24" src="https://blogger.googleusercontent.com/img/b/R29vZ2xl/AVvXsEhfCBRJw9c5IwcnlGZMl9glE3pShnALcB3ohUfdIpzFuo5Bl42GKkJpDgrA85XXDQDblzPEmIDJOy3Przeg7gQnUEVIJ2H_hqghNA_PN9RTaKh7GeaFbA8K_9vSvAFlrMUU1WeWxxeHTcKn/s1600/Brazil.png" style="cursor: pointer;margin-right:8px" width="24"/></a>
<br />
 <a class="google_translate" href="#" target="_blank" rel="nofollow" title="Japanese" onclick="window.open('http://translate.google.com/translate?u='+encodeURIComponent(location.href)+'&langpair=auto%7cja&hl=en'); return false;"><img alt="Japanese" border="0" align="absbottom" title="Japanese" height="24" src="https://blogger.googleusercontent.com/img/b/R29vZ2xl/AVvXsEiQ2xojqPkKYuYdsnpvislQGcUyw8xAUVU6K71ITtm08CziTN4Wy2Lq4QB9DPrJg2jlTRHZvcxzYdJe2skLVsa97naStGLYIsPORqdRvir_ppYHR3k5o4uUy1qyn2DvKAMxRQWhs5yzw8YP/s1600/Japan.png" style="cursor: pointer;margin-right:8px" width="24"/></a>

 <a class="google_translate" href="#" target="_blank" rel="nofollow" title="Korean" onclick="window.open('http://translate.google.com/translate?u='+encodeURIComponent(location.href)+'&langpair=auto%7cko&hl=en'); return false;"><img alt="Korean" border="0" align="absbottom" title="Korean" height="24" src="https://blogger.googleusercontent.com/img/b/R29vZ2xl/AVvXsEge25NW4VVat6qTfQ7kedH8HJ20eYitYZe5ZVjj8j5SY1QNXz5VZlJAubTs7g_ufVd8z5qgbZy62q61Okd7J99UgXSzC95WnVL4oHuHoYb9gAPlF-Kzf9v-2PIzCzVpeDtkL3M4ZFY6Scar/s1600/South+Korea.png" style="cursor: pointer;margin-right:8px" width="24"/></a>

 <a class="google_translate" href="#" target="_blank" rel="nofollow" title="Arabic" onclick="window.open('http://translate.google.com/translate?u='+encodeURIComponent(location.href)+'&langpair=auto%7car&hl=en'); return false;"><img alt="Arabic" border="0" align="absbottom" title="Arabic" height="24" src="https://blogger.googleusercontent.com/img/b/R29vZ2xl/AVvXsEjbe5im_fv5NfhY8NWk0WOdbMUSJo35qJpzJTTmcdVNClg9phET1CqDSa3D9x7bEEtDvIn8mfW3aTE8lM4zGquWmTaiQwARf89a28uZlyIuCMuwtPi9B-o_Ke0QbKzqSrd-IYGGdud2c3jA/s1600/Saudi+Arabia.png" style="cursor: pointer;margin-right:8px" width="24"/></a>

 <a class="google_translate" href="#" target="_blank" rel="nofollow" title="Chinese Simplified" onclick="window.open('http://translate.google.com/translate?u='+encodeURIComponent(location.href)+'&langpair=auto%7czh-cn&hl=en'); return false;"><img alt="Chinese Simplified" border="0" align="absbottom" title="Chinese Simplified" height="24" src="https://blogger.googleusercontent.com/img/b/R29vZ2xl/AVvXsEhxkRI1fxSJ_7aBdMwQ7C_Hc8OEtBFO3vi0RY2wdVN2HZ7VGGOpEsKU41oOu8Kj293G1SLwhuWfr1D3I2jqn6lk7-1MSvbLdGNvpPWAqwJkT697jtW0QPKWMHHb3KY1M8Lqp4g9nic-cmV6/s1600/China.png" style="cursor: pointer;margin-right:8px" width="24"/></a>
    <p><a href="#" id="example-hide" class="hideLink"
    onclick="showHide('example');return false;">Hide</p>
</div>
     </div>

Step 4. Now click on Save

google translate, blogger widgets, gadgets for blogspot
And you're done! Enjoy (:
Share:

Simple Recent Posts Widget for Blogger/Blogspot

The main advantage on this Recent Posts widget is that it will show not only post titles, but also post excerpts or snippets, and it's easy to customize or apply different style on it. To make it fit your own design, you will need to modify the CSS style - you can change the link or background color, the size and color of text/links.

What you can do with this widget:
- display post titles only
- change the number of posts
- change the number of characters of the post snippet/excerpt
- show the post dates

See the screenshot below:

How to add Recent Posts Widget to Blogger

Step 1. Log in to your Blogger Dashboard > go to "Layout" and click the "Add a Gadget" link


Step 2. From the pop-up window, scroll down and choose HTML/JavaScript


Step 3. Select & Copy the code from one of the options below and paste it into the new HTML/JavaScript:

Option 1: Recent Posts Widget with Snippets

<div id="hlrpsa">
<script src="http://helplogger.googlecode.com/svn/trunk/recent-posts-with-snippets.js">
</script>
<script>
var numposts = 5;var showpostdate = false;var showpostsummary = true;var numchars = 100;var standardstyling = true;
</script>
<script src="http://blog-address.com/feeds/posts/default?orderby=published&amp;alt=json-in-script&amp;callback=showrecentposts">
</script></div><a style="font-size: 9px; color: #CECECE; float: right; margin: 5px;" href="http://helplogger.blogspot.com/2012/04/simple-related-posts-widget-for-blogger.html" rel="nofollow" >Recent Posts Widget</a>
<noscript>Your browser does not support JavaScript!</noscript>
<style type="text/css">
#hlrpsa a {color: #0B3861; font-size: 13px;}
#rpdr, #rpdr a {color:#808080;}
#hlrpsa { color: #999999; font-size: 11px; border-bottom:1px #cccccc dotted; margin-top:-10px; padding-bottom:10px;}
.hlrps a {font-weight:bold; }
.hlrpssumm {}
</style>

Option 2: Recent Posts Widget Showing Post Titles Only

<div id="hlrpsb">
<script style="text/javascript" src="http://helplogger.googlecode.com/svn/trunk/recent-posts-with-titles-only.js"></script>
<script style="text/javascript">var numposts = 10;var showpostdate = false;var showpostsummary = false;var numchars = 100;var standardstyling = true;</script>
<script src="http://blog-address.com/feeds/posts/default?orderby=published&alt=json-in-script&callback=showrecentposts"></script></div><a style="font-size: 9px; color: #CECECE; float: right; margin: 5px;" href="http://helplogger.blogspot.com/2012/04/simple-related-posts-widget-for-blogger.html" rel="nofollow" >Recent Posts Widget</a>
<noscript>Oops! Make sure JavaScript is enabled in your browser.</noscript>
<style type=text/css>
#hlrpsb a {color: #0B3861; font-size: 13px;}
#rpdr, #rpdr a {color:#808080;}
.bbrecpost2 {
padding-top:6px;
padding-bottom:6px;
border-bottom: 1px #cccccc dotted; }
</style>
Step 4. Customize it:
- Change 5 (option 1) and 10 (option 2) with the number of posts that you want to display.
- Change false to true if you want the posts dates to appear
- Change 100 (option 1) if you want more characters to be displayed.
- To change the color and font size of the links, modify the values in blue (links) and violet (font-size)
- To change the style of posts summary, modify the values in green (color) and orange (font size)
- Replace the http://blog-address.com text with your URL

Step 5. Save your widget. And that's it! Enjoy!
Share:

jueves, 26 de abril de 2012

A Beautiful jQuery Drop-Down Menu For Blogger Blogspot

Alright, this time, we are going to make a stylish and simple jQuery drop down menu. The main objective is to make it as simple as possible, with some little jQuery effect and easy to customize/ apply different style on it. To style it into your own design, you just have to modify the a tag CSS style. You can change colors or put background images, or the size and color of text.
jquery menu, menu blogger

How to Add jQuery Drop-Down menu in Blogger

Step 1. Log in to your Blogger account and go to Template - Edit HTML


Step 2. Click anywhere inside the code area and press the CTRL + F keys to open the search box


Step 3. Type or paste this tag inside the search box and hit Enter to find it:
]]></b:skin>
Step 4. Add the following CSS just above ]]></b:skin>
#jsddm {
height: 40px;
margin: 0;
overflow: visible;
z-index: 2;
padding: 15px;
position:relative;
}
#jsddm li {
float: left;
list-style: none;
font: 12px Tahoma, Arial;
}
#jsddm li a {
display: block;
white-space: nowrap;
margin:1px 3px;
border: 1px solid #AAAAAA;
background: #cccccc;
background: -webkit-gradient(linear, left top, left bottom, from(#ebebeb), to(#cccccc));
background: -moz-linear-gradient(top, #ebebeb, #cccccc);
padding: 5px 10px;
-webkit-border-radius: 5px;
-moz-border-radius: 5px;
border-radius: 5px;
text-shadow: #ffffff 0 1px 0;
color: #363636;
font-size: 15px;
font-family: Helvetica, Arial, Sans-Serif;
text-decoration: none;
vertical-align: middle;
}
#jsddm li a:hover {
background: #C8C8C8;
}
#jsddm li ul {
margin: 0;
padding: 0;
position: absolute;
visibility: hidden;
border-top: 1px solid white;
}
#jsddm li ul li {
float: none;
display: inline;
}
#jsddm li ul li a {
width: auto;
background: #CAE8FA;
}
#jsddm li ul li a:hover {
background: #A3CEE5;
}

Step 5. Find this tag:
</head>
Step 6. Add this script right above/before it:
<script src='http://ajax.googleapis.com/ajax/libs/jquery/1.2.6/jquery.js' type='text/javascript'/>
  <script type='text/javascript'>
  //<![CDATA[
var timeout    = 500;
  var closetimer = 0;
  var ddmenuitem = 0;
function jsddm_open()
  {  jsddm_canceltimer();
  jsddm_close();
  ddmenuitem = $(this).find('ul').css('visibility', 'visible');}
function jsddm_close()
  {  if(ddmenuitem) ddmenuitem.css('visibility', 'hidden');}
function jsddm_timer()
  {  closetimer = window.setTimeout(jsddm_close, timeout);}
function jsddm_canceltimer()
  {  if(closetimer)
  {  window.clearTimeout(closetimer);
  closetimer = null;}}
$(document).ready(function()
  {  $('#jsddm > li').bind('mouseover', jsddm_open)
  $('#jsddm > li').bind('mouseout',  jsddm_timer)});
document.onclick = jsddm_close;
  //]]>
  </script>
Step 7. Hit the "Save Template" button to save the changes.

Step 8. Now let's add the HTML structure of the menu: Go to Layout > click on "Add a gadget" link


Step 9. Choose HTML/JavaScript from the pop-up window


Step 10. Paste the following code in the empty box:
<ul id="jsddm">
  <li><a href="#">Home</a>
  <li><a href="#">Link 1</a>
  <ul>
  <li><a href="#">Drop 1-1</a></li>
  <li><a href="#">Drop 1-2</a></li>
  <li><a href="#">Drop 1-3</a></li>
  </ul>
  </li>
 <li><a href="#">Link 2</a>
  <ul>
  <li><a href="#">Drop 2-1</a></li>
  <li><a href="#">Drop 2-2</a></li>
  </ul>
  </li>
 <li><a href="#">Link 3</a>
  <ul>
  <li><a href="#">Drop 3-1</a></li>
  <li><a href="#">Drop 3-2</a></li>
  <li><a href="#">Drop 3-3</a></li>
  <li><a href="#">Drop 3-4</a></li>
  </ul>
  </li>
 <li><a href="#">Link 4</a></li>
  <li><a href="#">Link 5</a></li>
  <li><a href="#">Link 6</a></li>
  </li></ul>
Note : Change the titles and replace the # symbol with the URL address of each of your links

Step 11. Click the "Save" button.


Important:
- if your menu is on the sidebar, or footer, just drag it to your page header and click Save again.
- if drop down links are not showing, do the following:

Go back to Template > Edit HTML and search (CTRL + F) this code:
<b:section class='header' id='header' maxwidgets='1' showaddelement='no'>
Change 1 with 3 and no with yes like this:
<b:section class='header' id='header' maxwidgets='3' showaddelement='yes'>
Save the Template.

And again, go to Layout and drag the menu immediately below the header


Click the "Save Arrangement" on the upper right side and that's it!


Here you can see the DEMO.
Share:

miércoles, 18 de abril de 2012

How to Add Emoticons/Smileys in Blogger Comments

Emoticons/Smileys are a great way of making discussions more interesting and fun, so it's a pity that Blogger don't support them. In this tutorial, I will show you some simple steps on how to add some very cool emoticons called Kolobok to your Blogger/Blogspot comments, so that you and your blog visitors will be able to have an enjoyable time together.

UPDATE: Now available for threaded commenting system too!
emoticons in blogger, kolobok smileys, threaded comments


How To Add Kolobok Smileys to Blogger Comments

Step 1. Log in to your Blogger account and go to Template - Edit HTML


Step 2. Click anywhere inside the code area and press the CTRL + F keys to open the search box


Step 3. Search (CTRL + F) for this tag:
</body>

Step 4. Copy and paste just above it, this code:

a) For previous commenting system with comments that have no reply function:
<!--kolobok-smileys-->
<script src='http://helplogger.googlecode.com/svn/trunk/[helplogger.blogspot.com]smileys.js' type='text/javascript'/>
<!--kolobok-smileys-->
b) For threaded commenting system with comments that have the reply function:
<script src='https://helplogger.googlecode.com/svn/trunk/kolobok threaded.js' type='text/javascript'/>
Note: ignore steps 5-8 if you are using threaded comments!

Step 5. Now find this code snippet:
<b:loop values='data:post.comments' var='comment'>
Step 6. Paste the following code just above it:
<div id='smileys'>
Step 7. Find the following code (look carefully, it should be somewhere below the code from step 5)
</b:loop>
Step 8. Paste the following tag just after it:
</div>
Step 9. Now find this code:
a) For previous commenting system:
<data:blogTeamBlogMessage/>
Note: if you'll find it like 4 times, stop to the 2nd one!

b) For threaded commenting system:
<div class='post-footer-line post-footer-line-3'>

Step 10. And add this code just after it:
<b:if cond='data:blog.pageType == &quot;item&quot;'><script type='text/javascript'>
//<![CDATA[
function moreSmilies() {
    document.getElementById('smiley-more').style.display = 'inline';
    document.getElementById('smiley-toggle').innerHTML = '<a href="javascript:lessSmilies()"><div style="font-size:small; font-weight:bold;color:#000000;">Hide Emoticons</div></a>';
}
function lessSmilies() {
    document.getElementById('smiley-more').style.display = 'none';
    document.getElementById('smiley-toggle').innerHTML = '<a href="javascript:moreSmilies()"><div style="font-size:small; font-weight:bold;">Show Emoticons</div></a>';
}
//]]>
</script>
<div class='emoticons'>
<span id='smiley-more' style='display: none;'>
<img src='https://blogger.googleusercontent.com/img/b/R29vZ2xl/AVvXsEjfZc2d6L-eZTCk7vfBsju-nEM58ahScCUQwlIkGD9WC03HcVhURydn1fromAGQG-o-99BP7zjndZjOQhqpzwgbTcjoh5oVXJdWANGUur0Ttl3tpGJOP26NWte5dIt5Ij6WyoK54lK8Grc/s1600/smile3.gif'/>:)
<img src='https://blogger.googleusercontent.com/img/b/R29vZ2xl/AVvXsEhXd2n2vwRFfkLP-nEjvmavWkZPGXk2fzASRWZWxtsGC7pn8zaIGIPwhmyFZDkO4idIReEIqZaS4eLu9BKrRstnpF8xJGCoh_lEPztnO36vCDDKrTVSsHoIGmgfo7mm2iEoVa9zuiCNcbg/s1600/sad.gif'/>:(
<img src='https://blogger.googleusercontent.com/img/b/R29vZ2xl/AVvXsEjzEGQro7pPpoF45w_BjVYRr9ehsdzOwwQn0fuYI4T4ehgsVJcSu84BJveq63NIjqdS1dYXNQDPx5FxuzRbqvMU5bTi5B35nSEOnlaxM4Y1HJu4dFIRtK7S0CHrIM_ZOG1DhcsjNHHBXWw/s1600/taunt.gif'/>:))
<img src='https://blogger.googleusercontent.com/img/b/R29vZ2xl/AVvXsEj55OxgTlCv5ITvQYN5VHD5150A9tcWykGV3qdYUAqrPs-JHJlghJGc5CzIozVl5xKrtVTfbKpwLzuq1bFHs8YqZsIn87wP3Pn9MfOjapm9LrrUZHZcAABRPavHOL9mYi-wDrhTZhjuETg/s1600/cry2.gif'/>:((
<img src='https://blogger.googleusercontent.com/img/b/R29vZ2xl/AVvXsEixLhzqsAZpuuLRWuspxL-xnTVWBjUdrL74StFE4rfHwV8IRjlFBSslMv3RCxi4DtZinWhQBI4p8pgXWtqr1TWXVYJEbPe-ZH-W_YbB-xFipP4JB88miocAmDoVlED_EbmFXdZ0yiS_xxM/s1600/rofl.gif'/>=))
<img src='https://blogger.googleusercontent.com/img/b/R29vZ2xl/AVvXsEj8BiDUfk3Oz96jYJZJhte1pAvgn3AAxtjZuFi7DQRmNj0ABjDWXxvMt7-rwGTplPDXhxAKiE46hhMsKP5csYt3S7jSfpovO4GBu19ZKQo2F4hsZgZi4KRrYpZXaoVJ5Am2Ve-Ifgl59n4/s1600/suicide.gif'/>=D&gt;
<img src='https://blogger.googleusercontent.com/img/b/R29vZ2xl/AVvXsEgqBdVPuuFr8ghy0s9gCRWoisGupp0vPbRrbUL_hBNjnuPZvkwXCIktNSX7dn3d7OSQgqQIMojJE_n1q67dqP-nwT8JZ3MEcQJR40wXnjL8ozbVLguYSfizf73uRopKDZ5IcPBVXj3RHYY/s1600/biggrin.gif'/>:D
<img src='https://blogger.googleusercontent.com/img/b/R29vZ2xl/AVvXsEhd1UI0aXY2F8l6SUZHtHxZp8wap1OUUch3yZC5D_hCXmdJJyYjGVYTrfRrJF4MGNhciqZb2vGUbahXb1n5DNuFRO4beDzAMM3M6AiApVoIIYVpULJYCTQZBjaoYJ6xPsLNKXl-1tvTH_g/s1600/tongue.gif'/>:P
<img src='https://blogger.googleusercontent.com/img/b/R29vZ2xl/AVvXsEjIW5lB3IkAI-FQQMtPE2xCA2RabstsF5EVUii_sK62yqF5Q4LV607QZGKL0zzOfqsfxq8O9q7l2sVuyeAMAgENeYrPjaSmuoLkNFxpaXg1BnJpeBW-SLiNIOiJXg36G8QE9iNQQ247PUk/s1600/shock.gif'/>:-O
<img src='https://blogger.googleusercontent.com/img/b/R29vZ2xl/AVvXsEhhblYhoRIZs9sL44QmCO6NAvgr2NIyL1TKw65U2_GbwQA2jeb0uFf1FXSOEbwJaY0iaDK9wsa6QBF6NHpnavZMLYl1vtoD-7oGXfZxXtcZqq34zSbrxRbOLfeJasiRG_QIitBEDEAOfro/s1600/think.gif'/>:-?
<img src='https://blogger.googleusercontent.com/img/b/R29vZ2xl/AVvXsEiYltny05mQeouSEjodHnt4ipGPFC_u3Y4ilx6zVdZxKaH-5hU2bVOEPIFGwScHQ1-mQg8gp8VUzZNa3E90JcvjoB0l5JfWhyphenhyphen6uTqsdbJMQs0due9mo2qv91ViXAhsgJdO_zg7ITR4iofM/s1600/unsure.gif'/>:-SS
<img src='https://blogger.googleusercontent.com/img/b/R29vZ2xl/AVvXsEgfOzzshJYTjkE6RTu8h6VjpXReVWke0orMFlK4HcsKGQxdBYjTBjPQXnH_8WdEKRQXI18S3R6DtrDjADyZec9dln27RrfNo5ay8QOIoJMQlc9MIb0NExiRH6FkVfwvpEbC0i9bbLLvs94/s1600/flowers1.gif'/>:-f
<img src='https://blogger.googleusercontent.com/img/b/R29vZ2xl/AVvXsEiI4ASKpNQXEvItKbfZX0hxggKy6irg3VHqCClTyqoZte8SFAJYq696cysNtCA0JbC7_qVnudqZnt2mJHqsKjg5SWXr82ee-9BEPafW2k0noQ_EQ74vyk6tJofIBVcBObJdCdv88KzVdxA/s1600/doh.gif'/>d(
<img src='https://blogger.googleusercontent.com/img/b/R29vZ2xl/AVvXsEhtUirOaRNMSjoQ1UIZ9a19pVKxTZ8lZkqf3qXMaWfwKLUZFGEPk8rEk1IlorF4bdi_BfI1_EMB7irTG933NtuD1us-wg6mBVFoTHISomVtIk9yKgEQ7dZGEAM7yk7GZxgAOIY2tE4rN50/s1600/air_kiss.gif'/>:-*
<img src='https://blogger.googleusercontent.com/img/b/R29vZ2xl/AVvXsEisQP37HHyggSxq2ccZKNtM-IUNSHCfGdL9hctTlVsdX_ZIl1Zy1jxbW4qO0XITRI6jwuzWEbjKKCoV_wYekY40xdiqNLn0FgNPEI2Ycyygm_T97mci2XtClU0th2OO2AM9ua3lbHCAONI/s1600/threaten.gif'/>b-(
<img src='https://blogger.googleusercontent.com/img/b/R29vZ2xl/AVvXsEj7n-VukW0fb8dV3rVP0DcIk1wpPpYha-aDyyYeXCZzkiJpWdSossps7hiIl36sofeqYpSf4j4Gc_IsvD1zBigx8qqc4AwLtp6xIIsoTWHYBaNVOQj9IAC7THBn3HbAId5EIziFPAvNX3o/s1600/help.gif'/>h-(
<img src='https://blogger.googleusercontent.com/img/b/R29vZ2xl/AVvXsEjchFFfTz6HsBsl51k2j-3GHle8rCVMufEqqtgPT3TyB1B9BoMwMYnZyzlU1RK8_QVV2gc3BrlkA-g_26g99LkY_W_Xu_5C53WRYMK4N6dhw0cT8YgYzempJ2bs_05_kJfyC3RZhXXoI60/s1600/good.gif'/>g-)
<img src='https://blogger.googleusercontent.com/img/b/R29vZ2xl/AVvXsEgyawjT3Ku4n4JHBzW9hKoFWS_ctuVPqKxOvitf8XcLoVGARkkAbRKwmnfTix2WnSzLcYv1jpSKw9d5-JtDjk6H11hHUjeK7ouYaBkISBV501TFxNh0EYaaOCxHcLh9cGuYRvyRPRNy_KY/s1600/beee.gif'/>5-p
<img src='https://blogger.googleusercontent.com/img/b/R29vZ2xl/AVvXsEj7at0gFydMyHwvqGDWbAW9i8Q38ahKRCDPtzQkmhyw2jXiBtN9JPxUUmjdWlQXbLU4hWleA_WPDoKRk2ojhcaAU4DP39voZn_nUhA8dzyNN6dRwF33OeWtgMKMFIktLo7VedPcalUC6SQ/s1600/yahoo.gif'/>y-)
<img src='https://blogger.googleusercontent.com/img/b/R29vZ2xl/AVvXsEgTIJa1IBlk7jLdDT2YfUmjxG-672Avwzr90a6pCbqD4JrjPvhv-D5XVmBqC8HBR_2tyvh2UyAxtJjZJcS5DLI7J1xxxRixJD9KJ_nTpryrI2EBhNBgaE_PG2688iyia4j4QR0Hln8skU8/s1600/crazy.gif'/>c-)
<img src='https://blogger.googleusercontent.com/img/b/R29vZ2xl/AVvXsEi0ZGKZwmrf9ixpqBnUeXAmLwby5XWQtEebjUF5PBFsg3yskfFykhFsHHSMeIm5hC3xuWRc6TrFVuwpLZz700cTylBgApVWiyFSHR-OrRYNrVwoB7qX3OGcbexb8t-P7TMo9t5bn8bc0zc/s1600/spiteful.gif'/>s-)
<img src='https://blogger.googleusercontent.com/img/b/R29vZ2xl/AVvXsEg7KY5IoNcqwUihkZIDlvTQ8X2wmb3FTUPKMsgyKL_ivgZ47tE3r1GFa0FXcAHMeGfMoGCznM-SxPRcfIbXBKoDGvF1-UfyCI3dZcdHnNIbiu8pexSCJLxh_MPAPMGApyU56GZ0cDOc_Kk/s1600/drinks.gif'/>d-)
<img src='https://blogger.googleusercontent.com/img/b/R29vZ2xl/AVvXsEjFh1_AQN_0O6B-5v-5VyOicFwnNtO20EJgIxQp9wht8JhuMNwCFP1i-QsytZ05qg9DiwwX1XzR2v629dGp0dsVxwPC9AfzotHQK5uXiNn7M5HuU3Ncq2vmFO2CshccvKRz5lvsnTFRrX4/s1600/cheer.gif'/>w-)
<img src='https://blogger.googleusercontent.com/img/b/R29vZ2xl/AVvXsEhQXQ4okTlqPD_ty5D-hyf1sls8QRpLdL81CVoOqJwOndzXRlKJ6r5VQejuahqojbcAf3MhNdbdNqr0GKjVsccep1eKVYXDpK9Qn5e4T5zLHqQVUBkH6qlUPUl1lxhROjIANxemLau0e8Q/s1600/hi+2.gif'/>:-h
<img src='https://blogger.googleusercontent.com/img/b/R29vZ2xl/AVvXsEg-Xb_tjBRL46Yzfh_mSCN2ZZV4DFGp_e7fpDNHBe-X6UGEY4qUmZ7MZNEzNSu9dYq0DMgQ7ddirDpdz-eqBGKxF1H5NjNfFI51BRrAAMiWrx3fFOcp7LNHmiAullckxbm43QsPNE6iwlY/s1600/give_heart.gif'/>:X
</span>
<span id='smiley-toggle'><a href='javascript:moreSmilies()'><div style='font-size:small;font-weight:bold;'>Show Emoticons <img src='https://blogger.googleusercontent.com/img/b/R29vZ2xl/AVvXsEjfZc2d6L-eZTCk7vfBsju-nEM58ahScCUQwlIkGD9WC03HcVhURydn1fromAGQG-o-99BP7zjndZjOQhqpzwgbTcjoh5oVXJdWANGUur0Ttl3tpGJOP26NWte5dIt5Ij6WyoK54lK8Grc/s1600/smile3.gif'/></div></a></span>
</div></b:if>
Note: Ignore steps 11-12 if you are using threaded comments!

Step 11. Finally, find this code
]]></b:skin>
Step 12. Add this one below, just above ]]></b:skin>
.emoticons {-moz-background-clip: -moz-initial;-moz-background-origin: -moz-initial;-moz-background-inline-policy: -moz-initial;text-align: left;width:400px;}
.emoticons a, .emoticons a:hover {margin-left: 20px;text-decoration:none;}
Note: if you want to change the size of the emoticon container, edit the red code.

Step 13. Save the Template and you're done. Enjoy!
Share:

How To Add or Change Favicon on Blogger Blogspot

Favicon (Favorites Icon) is the small picture (usually 16px x 16px in size) you see beside some some site's name in your browser's address bar. Having your own favicon with a nice graphical reminder of your site beside is a good way to get visitors attention. Blogger users can add a custom favicon for their blogs going to the Layout section  and by clicking on the Edit link on the "Favicon" element.


"For many bloggers, having a custom favicon (the tiny image displayed in your browser’s window or tab) is the finishing touch that ties together the design and identity of a great looking blog. Today, we're pleased to announce that Blogger in Draft users can now add a customized favicon to their blog. ~Blogger in Draft"

How To Add a Favicon to Your Blogger Blog

Step 1. Log in to your Blogger's Dashboard, go to the Layout and click on Add a Gadget link


Step 2. Click on the "Edit" link on the "Favicon" setting above the navbar element.


Step 3. A popup window will open where you can search for an image in your hard drive to replace the default favicon image. Click on "Browse" button and search for your favicon (it should have the .ico extension) - then click on "Save".


Step 4. Now you should see your own favicon instead of blogger's default favicon.


It might take some time until your new favicon will appear in your Browser's tab or window.

If you want to add animated favicons to your Blogger blogs, then follow this method below.

How to add an animated favicon in Blogger

Step 1. Log in to your Blogger account > Template > Edit HTML (if needed, click on Proceed button)


Step 2. Select the "Expand widget templates" box


Step 3. Search (CTRL + F) for:

 <b:skin> 

Step 4. Paste this code just above it:

<link href="your-favicon-links-goes-here" rel="icon" type="image/gif"/>

See the screenshot for more details
animated favicon blogger, how to


Note: replace your-favicon-links-goes-here with your favicon's link location

You can choose from here some cool favicons for your site/blog: http://www.favicon.cc/ (just download the favicon you like - upload it on tinypic or on a blogger's post, then copy the link address/direct link)

Step 5. Save the Template. And you're done!
Share:

How to number comments in Blogger/BlogSpot

This cool Blogger trick will help you to add comment count inside a speech bubble, so that you & your readers can use the numbers to mention or point to a particular comment on any of your posts. Besides this, numbering your comments might help you to improve the look and feel of your blog.

Note: This works with the previous blogger commenting system, so if you want to apply this trick, first you need to remove the Blogger threaded comments. See here How to remove Blogger threaded comments
UPDATE! Now you can have a comment bubble in your threaded comments also! For more info, please read this tutorial: How to Add Numbered Comments In Threaded Comments
blogger blogspot, tricks

How to add numbered comments on our Blogger/Blogspot blog

how to blog, blogspot blogger

Step 1. From your Blogger Dashboard, go to Template and click on the Edit HTML button:


Step 2. Click anywhere inside the code area and press the CTRL + F keys to open the search box:

Step 3. Type or paste the following code inside the search box and hit Enter to find it:
<b:loop values='data:post.comments' var='comment'>
Step 4. Just above it, paste this code:
<script type='text/javascript'>var CommentsCounter=0;</script>
Step 5. The, find this code:
<data:commentPostedByMsg/>
Step 6. And just below/after it, copy and paste this:
<!--comments-count-starts-->
<span class='comments-number'>
<a expr:href='data:comment.url' title='Comment Link'>
<script type='text/javascript'>
CommentsCounter=CommentsCounter+1;
document.write(CommentsCounter)
</script>
</a>
</span>
<!--comments-count-stops-->
Step 7. Find (CTRL+F) this tag:
</head>
Step 8. Just above the </head> tag, paste this code:
<!-- comments-count-starts-->
<style type="text/css">
.comments-number a:link, .comments-number a:visited {
color: black !important;
text-decoration: none !important;
background: url(https://blogger.googleusercontent.com/img/b/R29vZ2xl/AVvXsEjdkZ7WWwAyfPLH_hAEenhrEcPuav2gWID2cblscmMUTN4rGXU_5ld4cI840Zn8lW2xrXjptP5ZagQWuBolTVccprEIvuWCwmU7ej6Kh0XACWPaITZ_I1WH3YXqiycAQDVEZlXoNTh1ncnJ/s1600/comment+bubble+1.png) no-repeat;
width: 50px; /*image-width size*/
height: 48px; /*image-height size*/
float: right;
display: block;
margin-right: 5px;
margin-top: -15px; /*comments-counter position*/
text-align: center;
font-family: 'Century Gothic','Lucida Grande',Arial,Helvetica,Sans-Serif;
font-size: 15px;
font-weight: normal;
}
.comments-number a:hover, .comments-number a:active {
color: #1BA0E1 !important;
text-decoration: none !important;
}
</style>
<!-- comments-count-stops-http://helplogger.blogspot.com-->

Note:
  • To change the comment bubble, replace the text in red from above with your address
  • To change the color of the numbers, replace the text in blue with the hex value of your color. This tool can help you to pick up any color that you may need: Color code generator

Comment Bubbles 

To choose a comment bubble, right-click on the image and select "Copy Image Address/Location":

how to blogblogger blogspotblogspot blogger, how to blogwidget blogger blogspotblogs, how to blogblogspot or blogger, how to blogtutorials, how tocomments, how to, blogspot bloggernew comment, how to blogblog design, bloggerblogger.com

IMPORTANT: You can use any image instead of the one linked in the code above (STEP 8) but after you need to change the size values (width and height), so that the numbers inside the bubble won't float outside of it.

Step 9. Save the template and enjoy your comments :]

Related tutorial: Add a Comment Bubble to Blogger Post Titles
Share:

lunes, 16 de abril de 2012

How to Add A Comment Count Bubble To Blogger Post Titles

A comment bubble (or speech balloon) with the current number of comments displayed on each blogger post titles might be an excellent addition if you want to make your blog more attractive and engaging. Having a comment bubble icon could help you not only to get more comments on your blog but may, as well, give your visitors a hint about which are the most popular posts on your blog. When a post has received many comments, it could reflect the popularity of your posts and thus, make your readers and visitors to be more interested in reading them.
If you want to add a comment or speech bubble to your Blogger blog, then follow the next steps below:


Step 1. Log in to your Blogger Dashboard > go to Template > click the Edit HTML button

comment bubble, speech bubbles, blogger comment bubble

Step 2. Click anywhere inside the code area and press the CTRL + F keys to open the Blogger search box
blogger search box

Step 3. Find the following tag in your template:
]]></b:skin>
Note: before anything, you need to click on the small arrow next to it and after the code has expanded, search for the ]]></b:skin> tag again

Step 4. Just above ]]></b:skin> add the following CSS styling:
.comment-bubble {
float : right;
width : 48px;
height : 48px;
background : url(https://blogger.googleusercontent.com/img/b/R29vZ2xl/AVvXsEj__KOzIn3ax2HSLAKx_oJL5aZ-VxwB2TacyGXR4XWccklVmfjnRX4mvfZMD7DYb5eKO_eP0Rd4ivsPCWHzoKCPrNN20G5Le47_DhyphenhyphenZ07WQIOYDIXYeRTdvkGNGzs3amAR9LhkTrLeUKgfm/s1600/speech+bubble+green.png);
background-repeat: no-repeat;
font-size : 18px;
margin-top : -15px;
margin-right : 2px;
text-align : center;
}
Step 5. Now find this code:
<b:if cond='data:post.title'>
<h3 class='post-title entry-title'>
Note: If you can't find it, search this code instead:
<b:if cond='data:post.title'>
      <h3 class='post-title entry-title' itemprop='name'>
Step 6. And add this code immediately after it:
<b:if cond='data:post.allowComments'>
<a class='comment-bubble' expr:href='data:post.addCommentUrl' expr:onclick='data:post.addCommentOnclick' style='color: #ffffff; font-size: 18px; font-weight: bold;'><data:post.numComments/></a>
</b:if>
Note:
  • to change the color of the comments number, replace #ffffff with the hex value of your color;
  • to change the font size, increase/decrease the 18px value;
Step 7. Preview your template and if everything is ok, click on Save Template.

Comment Bubbles 

You can choose one of the images below - right click on the image you like and select "Copy Image Address/Location", then replace the blue code from step 4 with the address you just copied.

bubble comment count, bubble blogger postsblogger comments, comment countblogger blogspot, blogger commentsblogger bubble comment countcomments in blogger titlesblogger tips, blogger tricksblogger widgets, bubble comment countbubble comment countBubble Comment CountBubble Comment Count, blogger blogspot


That's it! Enjoy!!! (:

Do you need to add more info on your blog posts? Then I recommend you reading this tutorial:
Share:

Popular Posts

Blog Archive

Con la tecnología de Blogger.