miércoles, 28 de marzo de 2012

How To Add Related Posts Widget To Blogger with Thumbnails

Now here is a wonderful hack for displaying related posts beneath each of your blog posts, along with thumbnails. The related articles are chosen from other posts in that same category/label/tag. With this hack many of your readers will remain on your site for longer periods of time when they see related posts of interest.

Related: Related Posts Widget with Thumbnails and Summaries

related post, related posts blogger, blogger widgets

Adding the Related Posts Widget to Blogger/Blogspot

Step 1. Log in to your Blogger account and go to Template > Edit HTML

blogger template, edit html

Step 2. Click anywhere inside the code area and press the CTRL + F keys:

blogger search box, CTRL + F

Step 3. Search for this piece of code adding it inside the search box (hit Enter to find it):
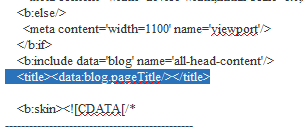
</head>
Step 4. Copy and paste the below code just before/above the </head> tag:
<!--Related Posts with thumbnails Scripts and Styles Start-->
<b:if cond='data:blog.pageType == &quot;item&quot;'>
<style type='text/css'>
#related-posts{float:left;width:auto;}
#related-posts a{border-right: 1px dotted #eaeaea;}
#related-posts a:hover{background: #EEEEEE;}
#related-posts h2{margin-top: 10px;background:none;font:18px Oswald;padding:3px;color:#999999; text-transform:uppercase;}
#related-posts .related_img {margin:5px;border:2px solid #f2f2f2;width:110px;height:100px;transition:all 300ms ease-in-out;-webkit-transition:all 300ms ease-in-out;-moz-transition:all 300ms ease-in-out;-o-transition:all 300ms ease-in-out;-ms-transition:all 300ms ease-in-out;-webkit-border-radius: 5px;  -moz-border-radius: 5px; border-radius: 5px; }
#related-title {color:#666;text-align:center;padding: 0px 5px 10px;font-size:12px;width:110px; height: 40px;}
#related-posts .related_img:hover{border:2px solid #E8E8E8;opacity:.7;filter:alpha(opacity=70);-moz-opacity:.7;-khtml-opacity:.7}</style>
<script type='text/javascript' src='http://helplogger.googlecode.com/svn/trunk/relatedposts.js' />
</b:if>
<!--Related Posts with thumbnails Scripts and Styles End-->
Note:
- to change the width and height of thumbnails, modify the 110px and 100px values in red
- to change the color and size of related posts titles, change the value in blue
- remove the line in violet if you want the related posts to be displayed both in homepage and post pages.

Step 5. Find the line below (you will find two times, but you need to stop at the second one):
<div class='post-footer'>
Step 6. Just above <div class='post-footer'> paste this code:
<!-- Related Posts with Thumbnails Code Start-->
<b:if cond='data:blog.pageType == &quot;item&quot;'>
<div id='related-posts'>
<b:loop values='data:post.labels' var='label'>
<b:if cond='data:label.isLast != &quot;true&quot;'>
</b:if>
<script expr:src='&quot;/feeds/posts/default/-/&quot; + data:label.name + &quot;?alt=json-in-script&amp;callback=related_results_labels_thumbs&amp;max-results=5&quot;' type='text/javascript'/></b:loop>
<script type='text/javascript'>
var currentposturl=&quot;<data:post.url/>&quot;;
var maxresults=5;
var relatedpoststitle=&quot;<b>Related Posts:</b>&quot;;
removeRelatedDuplicates_thumbs();
printRelatedLabels_thumbs();
</script>
</div><div class='clear'/><div style="font-size: 9px;float: right; margin: 5px;"><a  style="font-size: 9px; text-decoration: none;" href="http://helplogger.blogspot.com/2012/03/how-to-add-related-posts-widget-to.html" rel="nofollow" >Related Posts Widget</a></div>
</b:if>
<!-- Related Posts with Thumbnails Code End-->
Note:
- change the 5 value from max-results=5 with the number of posts you want to be displayed
- if you want the related posts to be displayed on homepage too, then remove the lines in violet

Update! If you are unable to see the related posts widget after saving the template, add the code (step 5) just above the </b:includable> tag which can be found above this line (CTRL + F to find it):
<b:includable id='postQuickEdit' var='post'>
For more info, click on this screenshot below:


Step 7. Save the Template and that's it. Now the Related Posts widget should appear below each blog post that has labels on it. Enjoy!
Share:

How to change Blogger "Post A Comment" Message

While the main secret of getting comments is to have good friends and creating good content, sometimes it is difficult getting more comments when we have a brand new blog that is not visited very often. A pretty good technique is to put images to encourage visitors to comment.
blogger post a comment
In this tutorial I want to show you how to replace the 'Post A Comment' text that appears above the comment form with an image. Also, I added a few cool images that you can use but you can as well add your own image, that depends on your tastes. So, let's start adding it!

How to replace Post a Comment with an image


In order to replace "Post A Comment" message in Blogger / Blogspot, follow the steps below:

Step 1. Log in to Blogger, go to your Blogger Dashboard and select your blog.

Step 2. Go to Template and press the Edit HTML button

blogger template edit html
Screenshot
Step 3. Click anywhere on the code area, then press the CTRL + F keys and search for this code (if you can't find the entire code, then search only for the one in red and you should see the rest of it):
<a expr:href='data:post.addCommentUrl' expr:onclick='data:post.addCommentOnclick'>
<data:postCommentMsg/></a>
...and for this one too:
<h4 id='comment-post-message'><data:postCommentMsg/></h4>
Step 4. Replace <data:postCommentMsg/> with one of the below image addresses:

<img src="https://blogger.googleusercontent.com/img/b/R29vZ2xl/AVvXsEj2s88AIaIpEc3jq0tkyEi0aFNaFZLA7JbpMo7uRQqddX_IsRxOEeQrwmjdjYeO9QJAu5b-CBbItI24JBES-XWKnNEr_-TlVNmdwIbtZpOD0-FqiZleLhO7GwwAWOm_jHFiDGNdt3Uht88/s1600/leave+a+comment.png" />


<img src="https://blogger.googleusercontent.com/img/b/R29vZ2xl/AVvXsEikEBpVAw_HKGHAbtKdeIAqV8DkHzBZDjm2LTP4DCDQ40o1g7KrlabHDmHoGrtBvr8Jyxz8Y5mP5cxbv-L-L_6gcdX_38yqbgQryd8CJwwfGO9Zoy0JlRNGYSh0DzQFoU1wMDbIl_hUHUs/s1600/Post+a+comment+blogger.png" />


<img src="https://blogger.googleusercontent.com/img/b/R29vZ2xl/AVvXsEjIDC20PQQ5em9ENg27vSiIxWhueMLEzXeMn2PfUVYMXWDRM4jVZb4mXU5XzXMOJjxVuI8yocGq-vjQpoQVxoeSYH9fJPsnBRD8FNxhIRPsPvdWwTbmryFOwmqRdHodAUMTO7WGcwAlxNxI/s1600/animated+comment+arrow.gif" />


<img src="https://blogger.googleusercontent.com/img/b/R29vZ2xl/AVvXsEh9BfWAk2K_FMVlj6SIIDsf1fMqWvyIlmI4-jcTgeL_xT2oY8Xv3zMUSWFE1KfMArIgSQOKVbasDZhkUpplsCeHamcwjZ0GZFdPcLy4h2mbMTqsDscpdL2s7C6nsyvkptzTir3v7IQQ5dUa/s1600/leave+a+comment2.png" />


<img src="https://blogger.googleusercontent.com/img/b/R29vZ2xl/AVvXsEgVVqHK3TVQ8qIAfJoQzzieM0SrElM8w6pi2chH1tuk2jRuU4DavwGt1rwWe1ExqMWTKz6H2Wj2AYD2Cs3dh7dwNWx-qtFBD5pbzkB-3CYci5fsa7Qq3l2mMMnsg3s37TllmzS8C-yIeX-R/s1600/comment.gif" />
You can use your own image instead. Just upload your image on Blogger, switch to Edit HTML tab, copy the image code and replace <data:postCommentMsg/> with your code.

UPDATE! Step 5. The first steps will replace the text only when there are no comments available. To show the image each time new comments are added, we should add the code of the image we want to appear after the 4th of the below code (you'll find it in more than one location):
<p><data:blogCommentMessage/></p>
If you want to center the picture, just put the code between the "center" tags... like this:
<center><img src="Image-URL"/></center>
Step 6. Save Your Template.

Thats it! I hope you like your new comment form!
Share:

domingo, 25 de marzo de 2012

How to optimize Images and Increase Blog Traffic

This tutorial will explain you how to optimize images before uploading them on your blog. Generally, most of people don't optimize images before uploading it to Blogger as needed. Optimizing images should be done if you want to improve the SEO (Search Engine Optimization) or your blog or site. Learning the correct and proper way of optimizing images in blogger is very important as well.

Google Image search is used widely for finding quality reference images, icons or photos. A great percentage of our blog traffic depends on Image search. When we are downloading images, most of the time they are saved with odd names and we don't take any interest in modifying the name. So we should always consider two things when uploading images on our blog - the proper use of the alt tag and changing the name of our images or pictures with the proper keyword.

1. Change Image Name with Keyword


optimize images

When we are downloading images from the internet, generally they are saved in local drive with some very odd names like untitled.png, img.png etc. So changing these names with appropriate keywords is always helpful. For instance, if I want to add img or untitled in this post, then I would definitely change these name with those words - or keywords - that would describe the best my content; thus, if I want to add an image to a post about seo topics, then I would name it something like SEO.png or optimize-image.png so that it would be relevant to the post content.

2. Use alt attribute

Search robots cannot read multimedia, be it graphic images or flash. An image is meaningless for search spiders if it is not defined (tagged). Therefore, in order to tell the search robots what the image is about, we can add an alt tag to our image code - when we upload a photo inside the post editor, click on the image and below it, click on the Properties link:

optimize image for seo

After clicking on the Properties link, the Image properties box will popup. Inside the Title text section, type a relevant title for your image and below, and in the Alt text section, type a short description of your image... then press OK.

seo optimizing images, images alt title

It is recommended to write short sentences to describe your pics and to keep the description limited to 4-5 words. Less is better. Also, make sure you don't use the same words, try to mix up your image keywords.

These are simple tips for SEO image optimization which are not only effective for your SEO but can also boost your traffic. If you are wondering how to get images for your blog, please read this tutorial: How to upload images and get the url of your pics
Share:

How To SEO Optimize Your Blogger Blog Titles For Higher Search Results

This is called "Blogger/blogspot Title Swapping". Swapping blogs title can help boost your position in search engine results page listing and also increase clickthroughs. From an SEO (Search Engine Optimization) perspective, page title is the most important element in your blog in terms of ranking well in search engines. If you look at your browser's title bar you will notice that Blogger's default templates display your blog title in front of each page or post title. So page title would normally be displayed as:

search results, blogger seo, seo

After swapping the blog title, it will be appearing like this:

seo optimization, title swapping, blogger optimize
This kind of placement will be also appearing in google search results. The reason why you should put post titles at the beginning is because users are more likely to search for specific post content rather than the actual name of your blog. So having the post titles at the beginning increases your chances of being found.

How to optimize blogger post titles

Step 1. Log in to your Blogger Dashboard and go to Template > Edit HTML


Step 2. Click anywhere inside the code area and press the CTRL + F keys to open the Blogger' search box

Step 3. Type or paste the code below inside the search box to find it:
<title><data:blog.pageTitle/></title>


Step 4. You need to replace the code above with this one:
<b:if cond='data:blog.pageType == "item"'>
<title><data:blog.pageName/> | <data:blog.title/></title>
<b:else/>
<title><data:blog.pageTitle/></title> </b:if>
Step 5. Click Save Template and you are done!
Share:

jueves, 22 de marzo de 2012

How To Remove Blogger Attribution Gadget

The Attribution gadget is the gadget in the footer that says "Powered By Blogger". If you have tried to remove this then you may of noticed this gadget is locked into you blog. To unlock it, follow the next steps:

blogger attribution, blogger hacks, powered by

Step 1. Log in to your Dashboard, go to Template > Edit HTML

blogger tricks, blogger hacks,

Step 2. Click anywhere inside the code area and press the CTRL + F keys to open the Blogger' search box

Step 3. Type or paste the following tag inside the search box then hit Enter to find it:
</head>
Step 4. Just above </head> add this code:
<style>
#Attribution1 {
display: none;
}
</style>
Step 5. Click on the Save Template button to save the changes.

That was all !
Share:

How to add a gadget/widget inside your Blogger Blog header

Some of you have noticed that many blogs have AdSense Units or other ads and widgets in the header section of the blog, one of the most popular format being the AdSense 468x60 ad unit.

gadget inside blogger header

Unfortunately, we are not always able to add a widget inside the blogger header as a Blogspot user. The reason is that if we are using the Blogger default template, or any other customized template available on the internet, the header may be locked and have no option to Add a gadget inside it or just next to the blog title.

The reason why some bloggers are using AdSense ads or different widgets in a blog header is because of its maximum of number of impressions. For instance, when a visitor goes to a page, this will be the first place where he would give a first look and this makes it one of the hottest spots in our blog.
But how we can add something inside blogger header - be it a Adsense unit, a search bar, social sharing buttons, or a widget? By simply adding a section in the blog's header. First off, to give space for the extra gadget to fit in, our blogger header should be resized.

Important!
Before anything, we need to make a back-up of our Blogger template so that if we do make any major errors, we can easily restore the original working template to our blog.

To make a back-up, go to Template and on the right side - click on the "Backup/Restore" button.


Clicking on this button, will prompt you to save your existing template as an XML file to your hard drive. You can change the name of the file and choose the location to ensure it is easy to find if you need to use this later.


Resize blogger header


Step 1. Go to Blogger Dashboard, click on Template > Edit HTML

Step 2. Click anywhere inside the code area and open the search box by using the CTRL + F keys:

adsense, blogger tricks, blogger widgets

Step 3. Add this code inside the search box, then hit Enter to find it:
<b:section class='header' id='header' maxwidgets=
Note: If you can't find it, make sure that you have no space at the beginning of it.

Step 4. Replace class='header' with class='header header-left'.

Step 5. Now we need to find - CTRL + F - the following line of code:
<div class='header-cap-bottom cap-bottom'>
And just above this line, we should see two div tags:
</div>
</div>
<div class='header-cap-bottom cap-bottom'>
Step 6. Paste the HTML code below just above these div tags:
<div style='clear:both;'/>

Now, let's go one step forward and add an extra gadget section within our Blogger header!

Add a new gadget/widget element to the Blogger Header


Step 7. Just above <div style='clear:both;'/> (step 6)... add this code:
<b:section class='header-right crosscol' id='header-right' maxwidgets='1' showaddelement='yes'/>
Step 8. Now find this tag:

    </head>

Step 9. Just above the </head> tag, add this CSS styling:
<style>
.header-left{
display: inline-block;
float: left;
}
#header-right {
display:inline-block;
float:right;
}
</style>
Note: if your widget is wider than overall area that both elements should occupy, then you might need to add the margin-right property to move it more on the right - see this example:
<style>
.header-left{
display: inline-block;
float: left;
}
#header-right {
display:inline-block;
float:right;
margin-right: -20px;
}
</style>
Step 10. Press the Save Template button to save the changes.

Step 11. Go to Layout of your blogger blog and you should see two gadgets on the header area.
You don't have to worry if the Add a Gadget element doesn't appear side by side as every blogger template is different. They might be slightly up or down or sometimes they might overlap each other. Just make sure that you drag the newly created widget just below the Header section.

widgets for blogger, blogger tricks

As I mentioned before, the header section could be one of the most valuable places in a blog. In that gadget/widget you can add anything like Adsense ads, search boxes, social sharing buttons, or you could, as well, sell that space for advertisement to boost your income.
Share:

lunes, 19 de marzo de 2012

How to Burn Blogger RSS Feeds at Feedburner

What is RSS?

A RSS (Really Simple Syndication) feed is a XML-based format for your content. Most blogging platforms, for example, will have an RSS feed built in. Whenever you start publishing posts, your latest posts will be updated in the RSS feed. Visitors to your website can subscribe to your blog’s RSS feed in an RSS reader such as Google Reader.

What is FeedBurner?
Most blogs have RSS feed which is detected automatically by commonly used feed readers when the blog URL is added to the reader.

However, if you want to make it more obvious and easier for readers to subscribe using RSS, or want to know exactly how many people subscribe to your blog then the best option is to add a Feedburner RSS feed and email subscription to your blog.

Feedburner is a free web service which enhances bloggers and podcasters ability to manage their RSS feeds and track usage of their subscribers.


How to create a feed with feedburner

1. Go to Feedburner and sign in to Feedburner with your Google Account (create a Google Account first if you don’t have one).

2. To set up your RSS feed with Feedburner, simply copy the URL of your RSS feed and paste it into the “Burn a feed right this instant” box. Then click Next >>


3. On the next screen, choose the second options - RSS.


4. On the next screen you will be given your RSS feed’s new URL on Feedburner. You will want to use this URL anywhere you reference your RSS feed on your blog. Change the feed title and address with your own.


5. When you click on Next, you will be given the options to setup tracking features for your RSS feed.
Check "Clickthroughs" and "I want more!..." options.


Adding Your Feedburner Feed To Your Blog

This is used to add the RSS icon and easy subscribe options to your blog side bar using a text widget as explained below:

1. Click on the Publicize Tab > Chicklet Chooser in your Feedburner account and copy the HTML code.

2. Go to Blogger Dashboard > Design > Page Elements and add a new gadget

3. Select HTML/JavaScript from the pop-up window and paste the html code in the box.

Adding a FeedBurner Email Subscription

After you have set up your feed, you will want to consider giving visitors the option to subscribe to your content via email. If so, you will want to go to the Publicize tab and click on Email Subscriptions. Click on the Activate button to start email subscription service for your RSS feed.


You will then want to click on Communication Preferences in the left sidebar menu. This will allow you to customize the activation email subscribers receive to confirm their subscription.


Once customized, click Save. The next options you will want to configure are under Email Branding in the left sidebar menu. This is where you can upload a logo, customize the Email Subject line, and change the font styles, colors, and sizes to format the email subscribers will receive. Click Save when finished.
The last (and most important) setting for your email subscription is the Delivery Options. This is where you will tell Feedburner what time to deliver new RSS feed updates to subscribers.

Once saved, click on the Subscription Management link. Here, you can get the code to add a subscription form on your blog or you can get a link to your take visitors to the opt-in form for subscribing via email.

To add it on your blog:

1. Go to Blogger Dashboard > Design > Page Elements

2. Add a new Gadget

3. Select HTML/JavaScript & paste the code in the box.

Redirecting All Your Blog Feed To Feedburner

Unless you redirect all your blog feed to Feedburner you won’t get accurate subscriber numbers because some of your readers subscribe using your original blog feed.

To do this:

1. Go to Settings > Site Feed in your blog dashboard

2. Add your Feedburner address to Post Feed Redirect URL and click Save Changes.


3. Now all your feeds is automatically redirected through FeedBurner and you’ll be able to track subscribers.

If you are enjoying reading this blog, please consider Subscribing!
Share:

sábado, 17 de marzo de 2012

Add Facebook Like Button Below Post Titles

facebook like button, blogger tricks

This Facebook Like button will allow visitors to Like your post and share it to their Facebook friends. In this post we will see how we can add a Like button for each individual Blogger post, and not a Facebook fan box for the entire blog (which is also a good idea to have in your sidebar). Having a Facebook Like button below your post titles makes easier for Facebook users to like specific posts on your blog, which in turn displays the liked content on their profile (and potentially on their friend's feeds).
If you want to add the Facebook Like Button below your blogger post title, then follow these steps:

Adding Facebook Like Button Below Post Titles


Step 1. Go To Blogger Dashboard > Template > Edit HTML 

Screenshot 
facebook for blogger, facebook button

Step 2. Click anywhere inside the code area and search - using CTRL + F keys - for this piece of code:
<data:post.body/>
Note: you might find it more than 3 times, stop to the second one (or third one in case it won't show up after applying the code from step 3)

Step 3.  Just above it, paste this code:
<p><iframe allowTransparency='true' expr:src='&quot;http://www.facebook.com/plugins/like.php?href=&quot; + data:post.url + &quot;&amp;layout=button_count&amp;show_faces=false&amp;width=100&amp; action=like&amp;font=arial&amp;colorscheme=light&quot;' frameborder='0' scrolling='no' style='border:none; overflow:hidden; width:100px; height:20px;'/></p>
Screenshot

facebook button

Step 4. Save your template and you are done with this simple implementation of the Facebook Like button on your Blogger blog.
Share:

Auto Read More with thumbnail for Blogger/Blogspot Posts

How to make posts in the blog homepage to be displayed with an automatic "read more" button and a thumbnail.

To be more specific, this will show the title of the post, then a short summary with a number of characters and a thumbnail, that will be the thumbnail of the first image uploaded inside the post. After the thumbnail and the post summary, there will be a "Read More" link, which when you click on it, will take you to the actual post.
This Automatic Read More script will summarize content and a post summary will be shown only on the main blog page (homepage), category pages, and archive pages.


Using the Automatic Read More feature in Blogger Posts

Step 1. From your Blogger dashboard, go to Template and click on the Edit HTML button:


Step 2. Click anywhere inside the code area, then press the CTRL + F keys and search for this code:
<data:post.body/>
Note: after hitting Enter, you'll find this code more than once but you need to stop at the third one.

Step 3. Replace the code above with this one:
<b:if cond='data:blog.pageType != &quot;static_page&quot;'>
<b:if cond='data:blog.pageType != &quot;item&quot;'>
<div expr:id='&quot;summary&quot; + data:post.id'><data:post.body/></div>
<script type='text/javascript'>createSummaryAndThumb(&quot;summary<data:post.id/>&quot;,&quot;<data:post.url/>&quot;,&quot;<data:post.title/>&quot;);</script>
 <span class='readmore' style='float:right;'><a expr:href='data:post.url'>Read More &#187;</a></span></b:if></b:if>
<b:if cond='data:blog.pageType == &quot;item&quot;'><data:post.body/></b:if>
<b:if cond='data:blog.pageType == &quot;static_page&quot;'><data:post.body/></b:if>
Note: if you don't see any changes after going through all the steps, please try to replace the second <data:post.body/> as well.

Step 4. Now search for the following tag:
</head>
Step 5. Just above the </head> tag, add the following code:
<script type='text/javascript'>
posts_no_thumb_sum = 490;
posts_thumb_sum = 400;
img_thumb_height = 160;
img_thumb_width = 180;
</script>
<script type='text/javascript'>
//<![CDATA[
function removeHtmlTag(strx,chop){
if(strx.indexOf("<")!=-1)
{
var s = strx.split("<");
for(var i=0;i<s.length;i++){
if(s[i].indexOf(">")!=-1){
s[i] = s[i].substring(s[i].indexOf(">")+1,s[i].length);
}
}
strx = s.join("");
}
chop = (chop < strx.length-1) ? chop : strx.length-2;
while(strx.charAt(chop-1)!=' ' && strx.indexOf(' ',chop)!=-1) chop++;
strx = strx.substring(0,chop-1);
return strx+'...';
}
function createSummaryAndThumb(pID, pURL, pTITLE){
var div = document.getElementById(pID);
var imgtag = "";
var img = div.getElementsByTagName("img");
var summ = posts_no_thumb_sum;
if(img.length>=1) {
imgtag = '<span class="posts-thumb" style="float:left; margin-right: 10px;"><a href="'+ pURL +'" title="'+ pTITLE+'"><img src="'+img[0].src+'" width="'+img_thumb_width+'px" height="'+img_thumb_height+'px" /></a></span>';
summ = posts_thumb_sum;
}

var summary = imgtag + '<div>' + removeHtmlTag(div.innerHTML,summ) + '</div>';
div.innerHTML = summary;
}
//]]>
</script>

<b:if cond='data:blog.pageType != &quot;static_page&quot;'>
<b:if cond='data:blog.pageType != &quot;item&quot;'>
<style type='text/css'>
.post-footer {display: none;}
.post {margin-bottom: 10px; border-bottom: 1px dotted #E6E6E6; padding-bottom: 20px;}
 .readmore a {text-decoration: none; }
</style>
</b:if>
</b:if>
Note: 

- To change the number of characters shown when there is no thumbnail, modify the 490 value in blue. For the number of characters shown when a post has a thumbnail, modify the 400 value.
- If you want larger thumbnails, modify the 160 (height) and 180 (width) values in red.

Step 6. Click on the Save template button to save the changes.

That's it, enjoy!
Share:

viernes, 16 de marzo de 2012

Adsense Ad Code Converter

HTML has special handling for characters like < and > symbols, so it doesn't work well with those characters where they shouldn't be.

Having spurious characters like those symbols in your text can have some weird effects - blocks of text not appearing, broken formatting, and generally just not seeing what you expect to see.

This can all be fixed by 'escaping' those characters. This process involves scanning the text for those characters, and replacing them with a special character-code that browsers can interpret as the correct symbol, without actually embedding that symbol in your text.
For example, the escaped character code for > is &gt;.

This tool automatically converts javascript ad code into the correct format so you can embed it directly into your new xml Blogger template. It’s perfect for converting AdSense, AdBrite, Chitika or any other javascript ad code you may have.

paste code
Instructions

Paste your Adsense code or any HTML in the empty box and then press the Convert button.
Share:

How to put Adsense ads on Blogger/Blogspot

If you want to earn money from your site/blog, Google Adsense is the most popular service to monetize your blog or website content. When implemented, Adsense will display targeted Google ads on your blog and they can generate revenue on either a per-click or per-impression basis.

In order to display ads on your site, you should first Sign Up to Google Adsense program.

Before adding your ads, keep in mind that Adsense allows only up to 3 ad units, 3 link units and 2 search boxes per page.

In this tutorial i will show you the three ways you can add Adsense ads to your blog.

1. Adsense Gadget


Use this method to add ad unit as a widget, in places outside the blog post area. You can position it by simply dragging it in Page Elements, just like any other widget. To add the Adsense Gadget, follow these steps:
Step 1. Log in to your Blogger Dashboard, go to Layout and click on the "Add a Gadget" link on the right side.

blogger layout, add a gadget

Step 2. From the pop-up window, select the AdSense Gadget

adsense gadget, blogger widgets

Step 3. Configure ad format and colors (see the screenshot for more details)

adsense format, adsense blogger

Step 4. Finally, click on the Save button and you're done.

2. Inline Ads


This will display an ad unit at the end of each post. To show ads between posts:

Step 1. Go to Design > Page Elements and click the Edit link in Blog Posts gadget box.

blogger posts, blogger layout

Step 2. Check the "Show Ads Between Posts" box.

show ads in blogger

Step 3. Configure ad frequency, ad format, and colors. Live preview is provided beneath the settings.

Step 4. Click on the Save button to save the settings.

3. Adsense code


The most notable benefits of using this method are:
  • You can place ad anywhere in your blog
  • You can add the code anywhere in your blog template - in your post content or page.
  • To find out which format perform the best, custom channels will help you to track the performance of specific groups of ad units.
  • You can choose types other than ad unit i.e. link unit, search box.

To create an ad unit:

Step 1. Go to Google Adsense website.
Step 2. Click on My ads tab, go to Ad units and then click on the "New ad unit" button.


Step 3. Choose your ad type, choose format and colors and assign channels.
Step 4. When you have finished editing, click on the Save and get code >> button and copy the code provided.

To add an ad unit to your blog, you have the following options:
  • Paste the code in a HTML/Javascript gadget
  • Paste the code in the blog post or page HTML section, or
  • Paste the code direct in your template. (if you choose this option, first you should convert adsense ad code)
If you have any more questions, leave a comment below.
Share:

Popular Posts

Blog Archive

Con la tecnología de Blogger.